
How to Make Jeans Longer: The Professional Method for Elongating Vintage Denim
By Maurice Malone Published July 5, 2026
You found the perfect pair of vintage jeans online or at a thrift store. The wash is immaculate, the fading is natural, and the fit is spot on. There is only one dealbreaker: they are two to three inches too short.
Traditionally, standard tailor shops will tell you that making jeans longer is impossible once the fabric has been cut. At Williamsburg Garment Company, we approach denim alterations differently. Instead of abandoning a rare pair of vintage jeans or letting them sit at the back of your closet, we use professional factory methods to extend your inseam while elevating the garment's overall design.
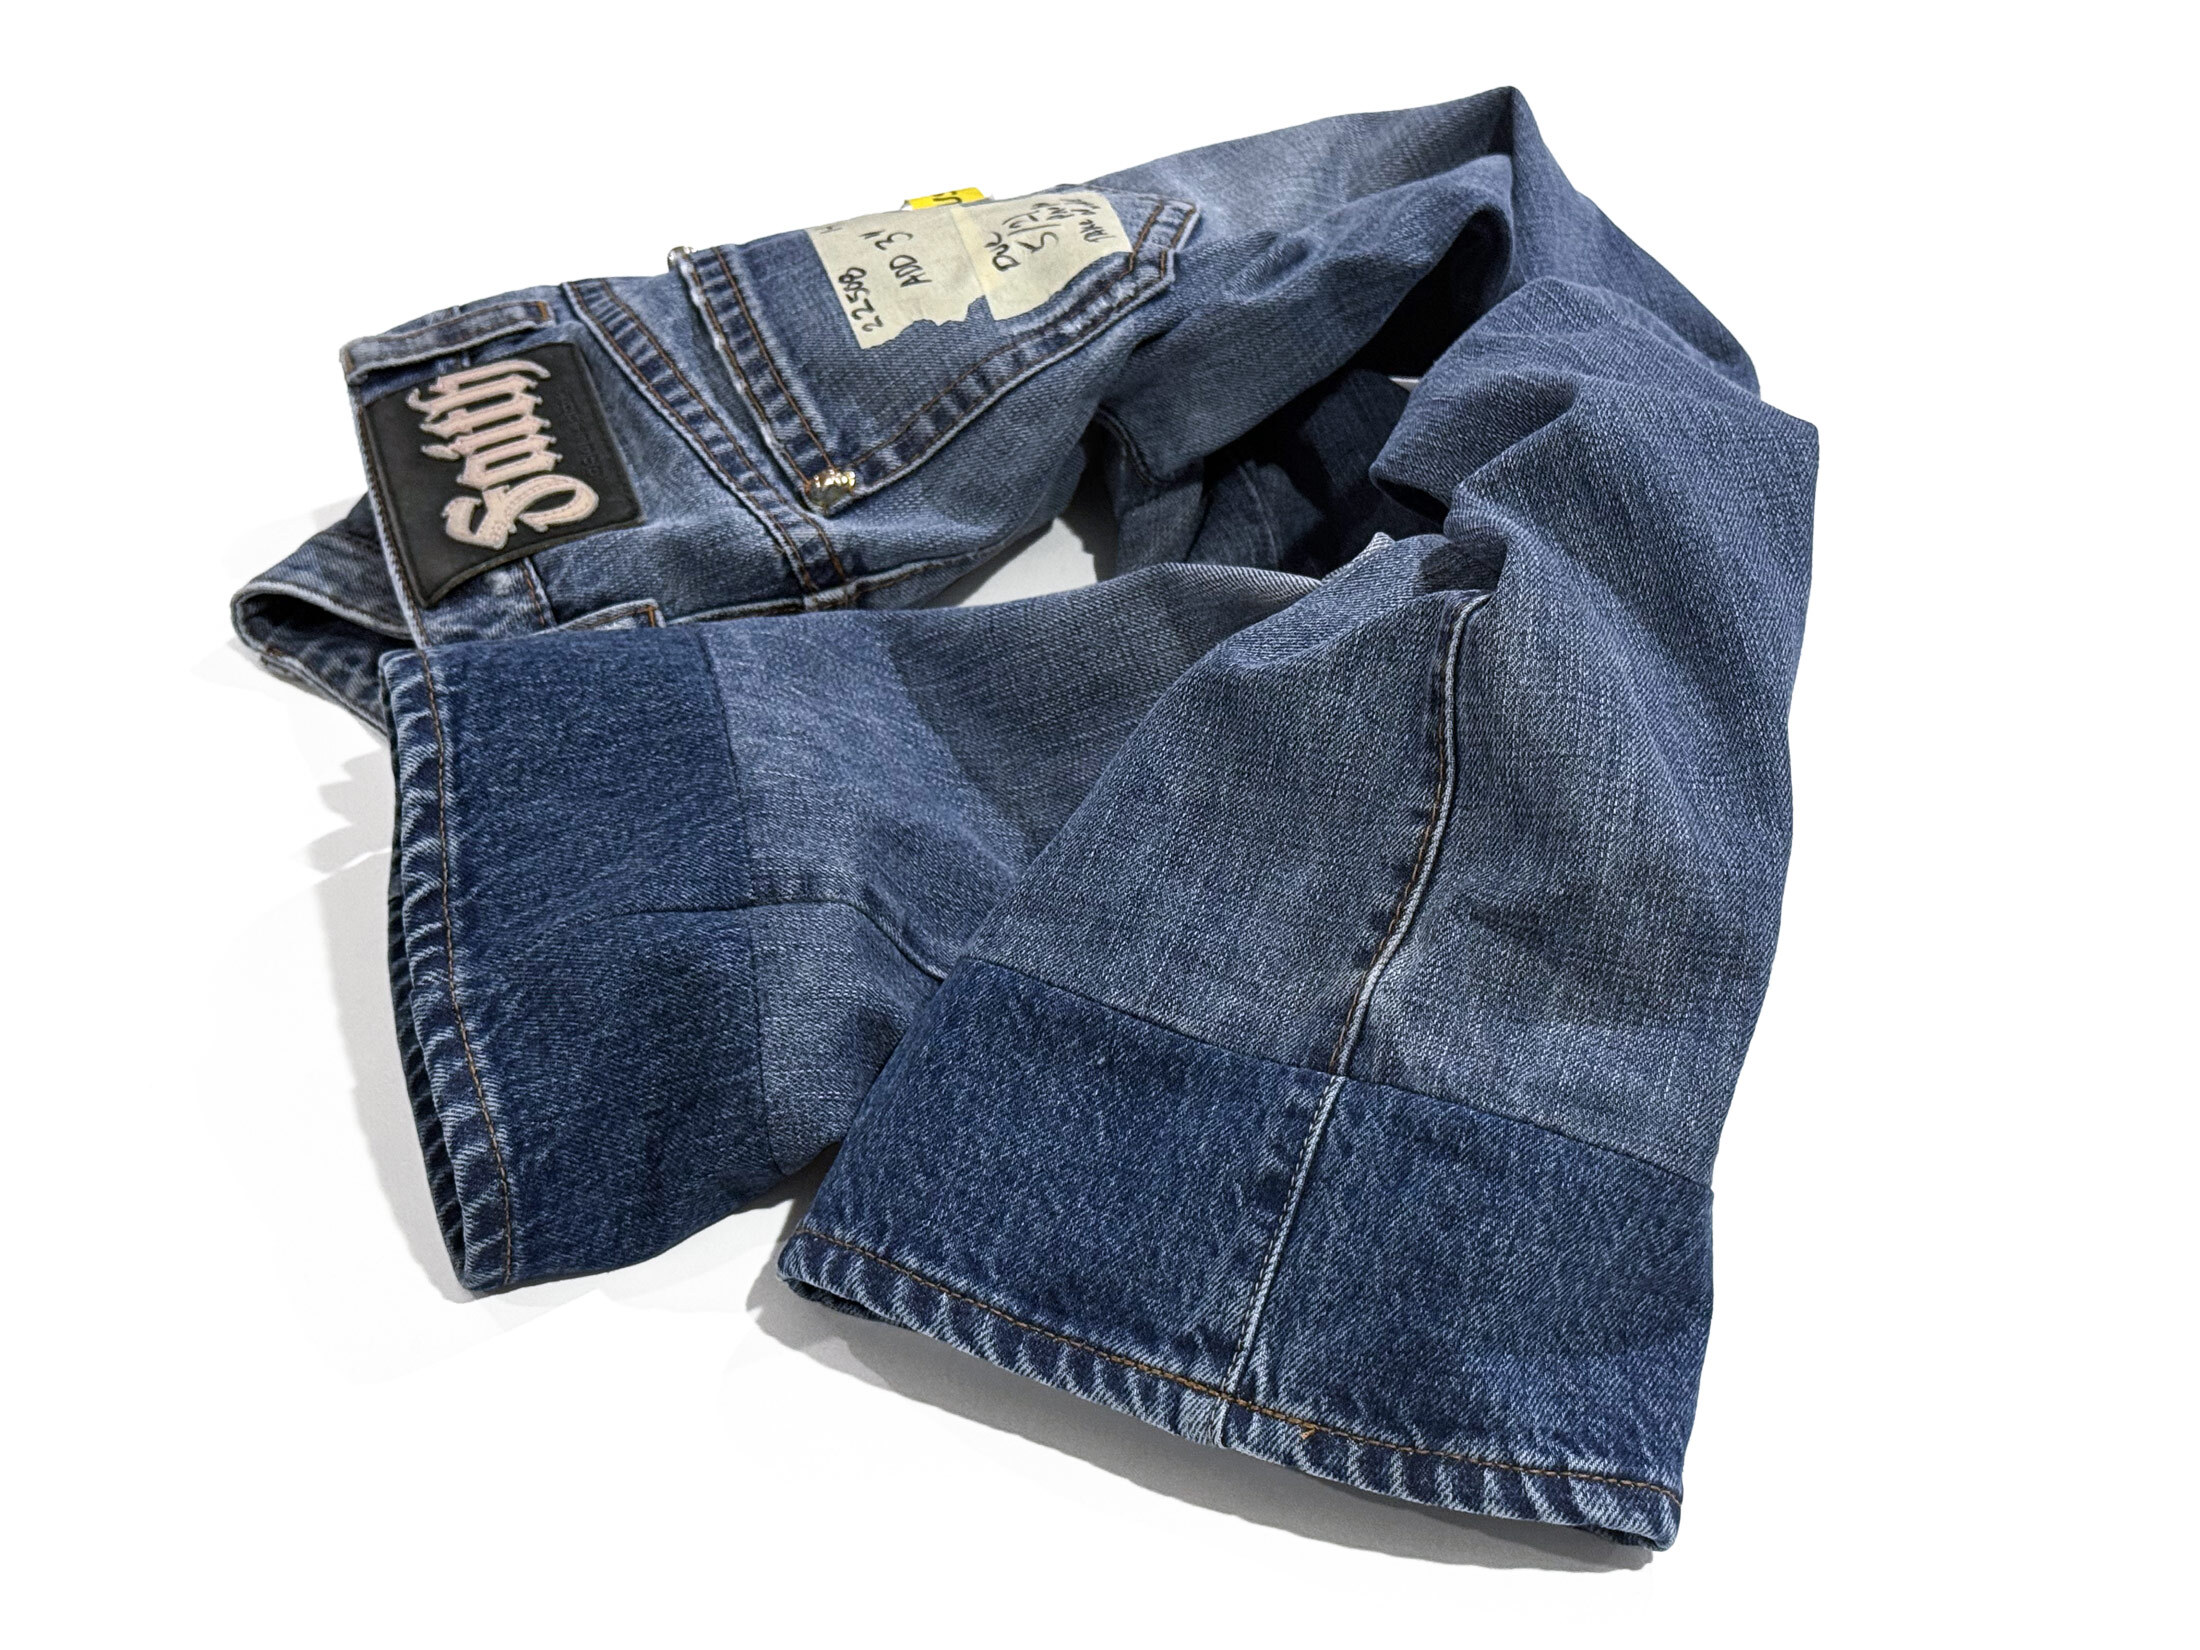
Below is an exact breakdown of the specialized restoration process featured in our latest workshop video, demonstrating how we saved a short pair of vintage denim by executing a clean, intentional, contrasting hem extension.
Step 1: Removing the Previous Alteration
Many vintage jeans found on the secondary market have undergone poor previous alterations. In this specific project, the jeans arrived with a crudely attached "original hem" style alteration that drastically shortened the inseam.
Step 2: Preparing the Side Seams
You cannot cleanly attach a new fabric panel to a closed cylinder. To ensure the new stitches lay perfectly flat and structural tension is evenly distributed, we opened up the outseam of the jeans near the bottom opening. This step allows our tailors to sew in a perfectly straight, precise line when marrying the two sections of denim together.
Step 3: Prepping the Extension Block
For this extension, we sourced a matching-weight but darker-washed denim hem panel from our extensive in-house library of vintage scrap denim. Before attaching it, we unpicked the existing chain stitch from this donor piece. This allows us to flatten out its outseam completely, preventing bulky, overlapping fabric lumps where the old and new seams meet.
Step 4: Overlocking and Joint Construction
To prevent fraying and guarantee a factory-grade interior finish, we cover-stitched the raw edges of both the vintage jeans and the new extension piece. Next, we aligned the panels and stitched them together in a perfectly straight line.
Step 5: The Authentic Union Special Chain Stitch
The final step is what separates a standard alteration from a true denim restoration. We took the newly elongated jeans to our vintage industrial chain stitch machine to build the new bottom hem.
Chain stitching is non-negotiable for premium and vintage denim. Unlike a standard lockstitch used by traditional dry-cleaner tailors, a heavy-duty chain stitch creates the precise structural tension required to develop authentic "roping effects" and beautiful high-and-low fading patterns along the hem over time.
The Result: A Deliberate, High-End Design Detail
As you can see in the finished photo, the result is completely seamless. By pairing a lighter vintage leg with a structurally identical, slightly darker vintage hem extension, the contrast looks entirely intentional. It transforms a sizing defect into a custom, well-crafted design detail that respects the age and character of the vintage denim.
This specialized technique is highly effective for:
- Saving rare vintage finds that are otherwise too short.
- Correcting mistakes made by other tailors who accidentally cut your raw denim too short.
- Reclaiming shrinkage on premium raw denim after an unexpected hot wash.